To the left of the entryway, is the "Fancy" or Best room. This would have been used as a parlor, dining, or gathering room. It is where the homeowners would have greeted and entertained their guests. We plan to use this as the dining room.
The original wainscoting is amazing. We will restore the missing wood trim as closely as possible and clean the painted walls.
Below, a picture from 2011. A bit blurry, but you can see the floor was completely deteriorated.
Below November 2012. A new sub floor. And original window sashes are repaired and fit back into each window.
Below Spring 2014. Original windows glazed and installed.
Work continues. . .
Saturday, December 27, 2014
Wednesday, December 24, 2014
Friday, December 19, 2014
A Quick Peak . . .
Here are a few pictures to show our progress on framing the "unfinished" space, upstairs.
Bathroom . . .
Hallway to third bedroom . . .
Bathroom . . .
Hallway to third bedroom . . .
Saturday, December 13, 2014
Walls, Floors, and More
We continue to frame walls, lay floors, rough plumbing, duct work, and electrical.
Months ago, we framed out the doorway to the upstairs back space.
Which gave us access to the back unfinished area.
The doorway was closed in beautifully with the wood cut from the wall.
Months ago, we framed out the doorway to the upstairs back space.
Which gave us access to the back unfinished area.
Sistered joists and blocked inserts.
The doorway was closed in beautifully with the wood cut from the wall.
And now, an antique heart pine floor is going down, and you can see the roughed in plumbing for the second floor bathroom.
Sunday, November 23, 2014
Upstairs
We continue with the second floor. With the front of the house complete, we move to the back unfinished space. Joists are now sistered, and blocked inserts are done.
We will be finishing this area with a second floor bathroom and a third bedroom. Here's the plan (freely drawn!):
The upstairs front floor has been reinstalled. Yay!
And the second bedroom wall is up.
Can we look back? Here are a few pictures of the second floor from our first visit to the house in spring 2011.
I'll leave you with a better image from last winter of John installing the restored second floor back window.
Sunday, November 2, 2014
Electrical work continues . . .
Renovating an old house feels like a rollercoaster ride. We chug along for months, suddenly we reach the crest, down we go, and the pace picks up. Projects are ticked off quickly. Then, we slow down, and catch our breaths. Time to review, think, imagine, and plan.
Roughing electrical continues. Plumbing next, but we still need to figure out the second floor bathroom.
Light switches at the front door.
Saturday, August 9, 2014
Upstairs and Electrical work
With floor boards removed on the second floor, we sistered new joists next to old ones. Then blocked inserts between the joists.
Blocked inserts below
With the floor boards still removed, we have roughed in electrical upstairs. Ceiling lights for the first and second floors, and second floor outlets and lights switches. Done.
And the first floor bathroom.
Blocked inserts below
With the floor boards still removed, we have roughed in electrical upstairs. Ceiling lights for the first and second floors, and second floor outlets and lights switches. Done.
And the first floor bathroom.
Saturday, June 28, 2014
Walls and Floors
We're framing walls. Downstairs in the back room will be the bathroom and laundry. Installing these necessary modern rooms into old houses can often seem awkward and "added-on". We want these rooms to feel as natural as possible to the house. A window in each of these spaces helps with that "always been there" feeling.
Bathroom walls framed below.
Laundry room closet below.
FLOORS
We've pulled up the entire floor in the upstairs front. The sub floor is in very good shape, but in need of some additional support. See pictures below. New joists are sistered with the existing joists, and we'll add more in between for a rock solid second floor. You can see the wood of the first floor ceilings. All in great condition.
Wednesday, April 30, 2014
Painting the front door and protecting the Heart Pine thresholds
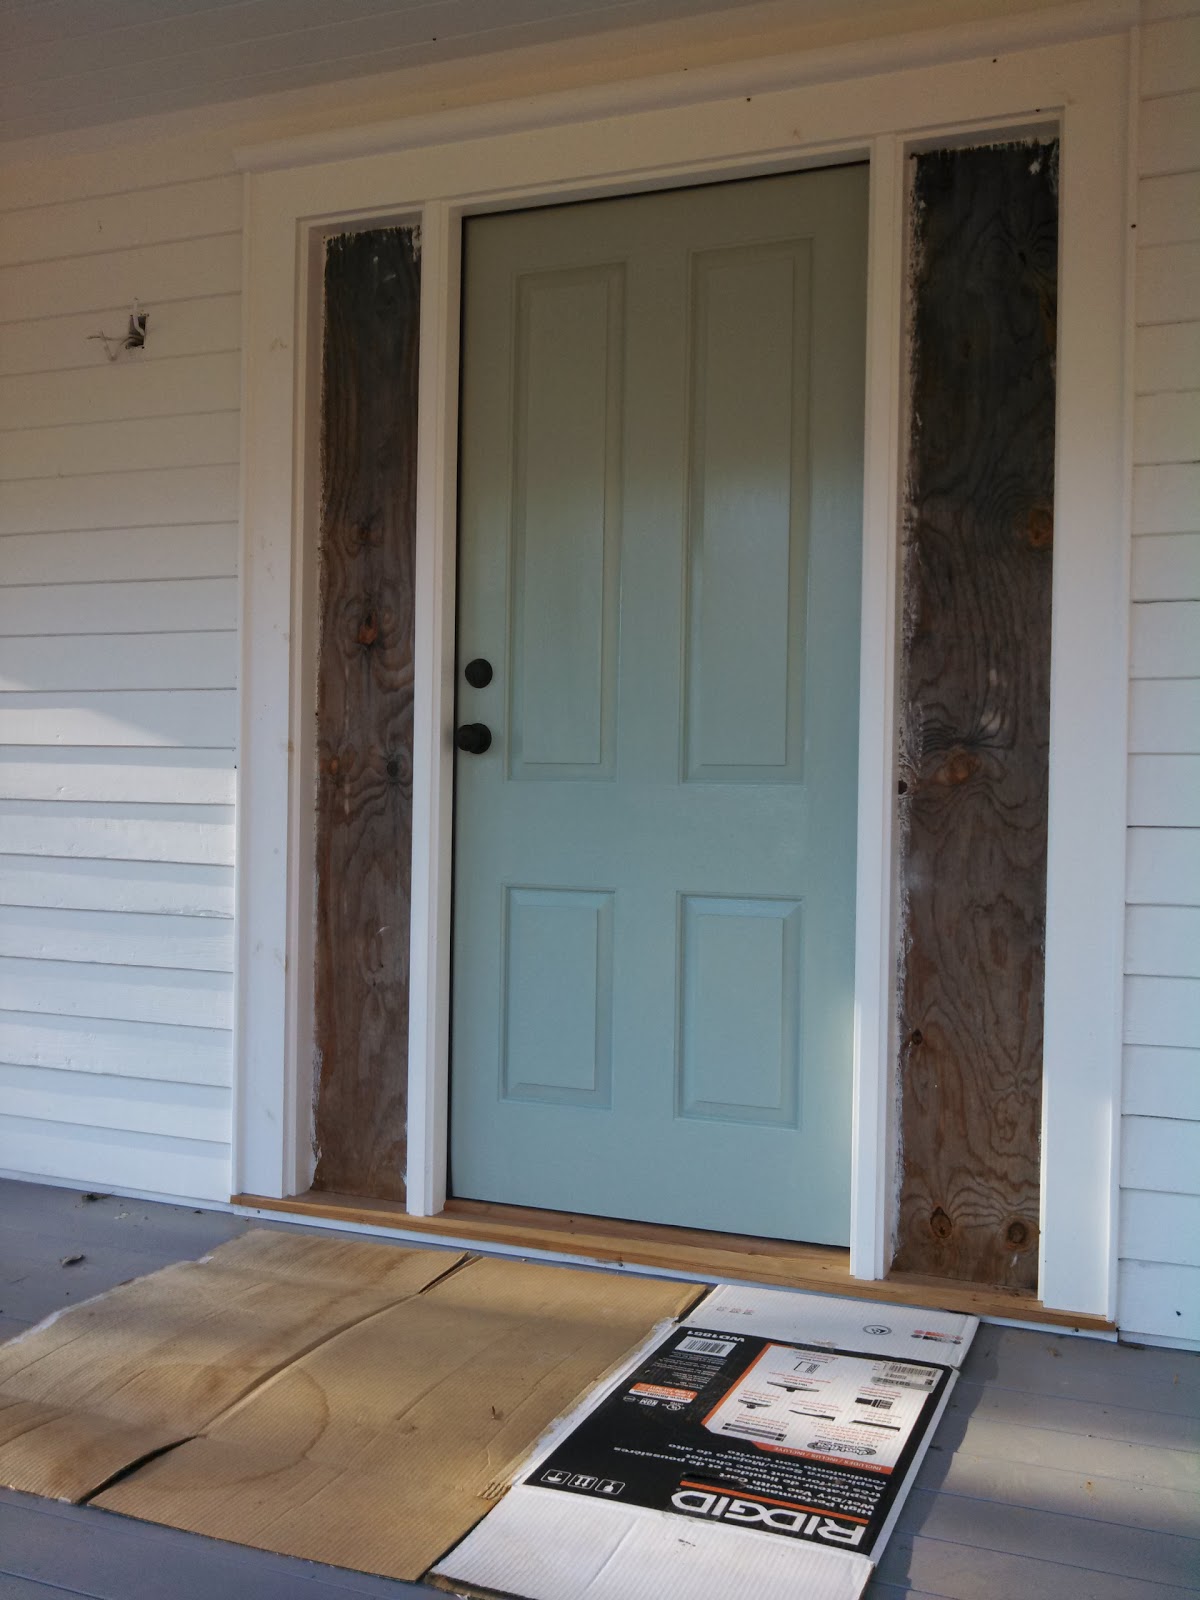
Last weekend, John painted the second coat on the front door. We used Benjamin Moore "Wythe Blue" for the color.
And . . . we varnished the heart pine thresholds with a mixture of tung oil and urethane. Three coats. The mixture will provide durable protection, but has a soft, worn look.
And . . . we varnished the heart pine thresholds with a mixture of tung oil and urethane. Three coats. The mixture will provide durable protection, but has a soft, worn look.


.jpg)


